Load testing a Django based application with jMeter is a tricky thing to do since Django requires a CSRF (Cross-Site Request Forgery) token to be present on every POST request (unless you have disabled it, of course). This tutorial helps you to hit the ground running with your Django tests, as I have prepared a ready made test file for you. 🤓
Download jMeter test file for Django.⬇️
There are a couple of things you have to specify before you go ahead and click on the run button.
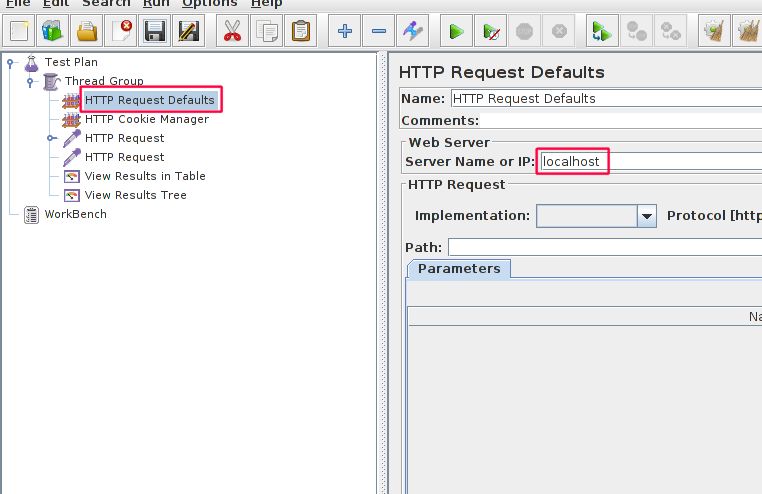
1) Specify the URL of the application you are going to test with jMeter under Test Plan -> Thread Group -> HTTP Request Defaults -> Server Name or IP
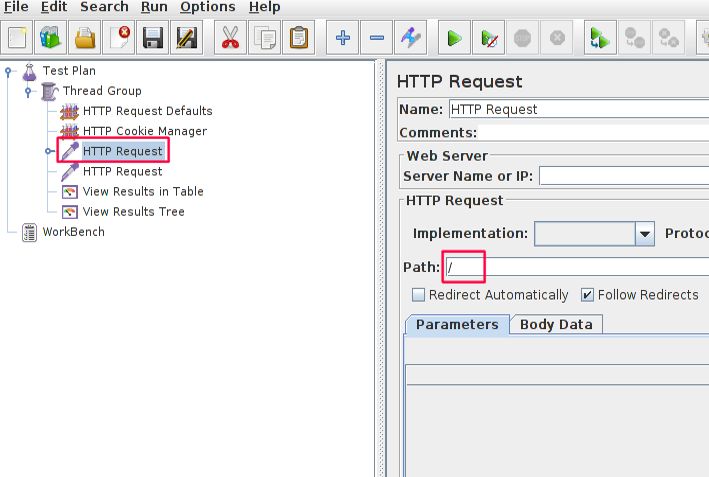
2) Go to the first HTTP Request and change the path to a view in which you have used the {% csrf_token %} template tag. In other words, a view that contains a form that is sent using POST. If you don't have such a form in your application but all the POST requests are handled by JavaScript, you can add the {% csrf_token %} tag somewhere in your template. It will only create an invisible input field with the CSRF token that the Regular Expression Extractor will extract to make testing POST requests on jMeter work.
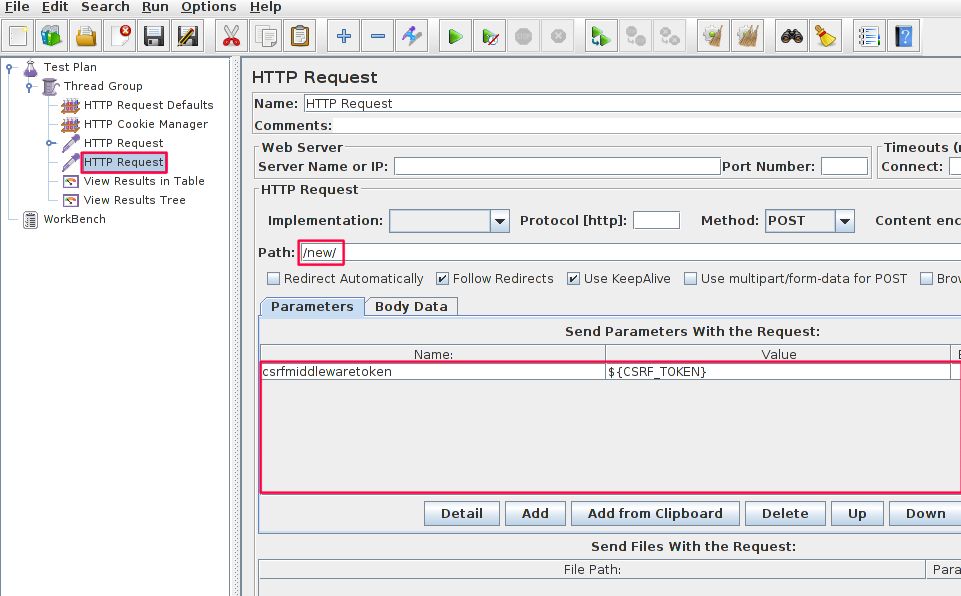
3) Now click on the second HTTP Request. This is where we are actually going to test the POST request. Specify the path to a URL you want to send a POST request to. In addition, specify the POST parameters you want to use. As you can see, the CSRF token is already placed as a parameter here from the previous HTTP Request.
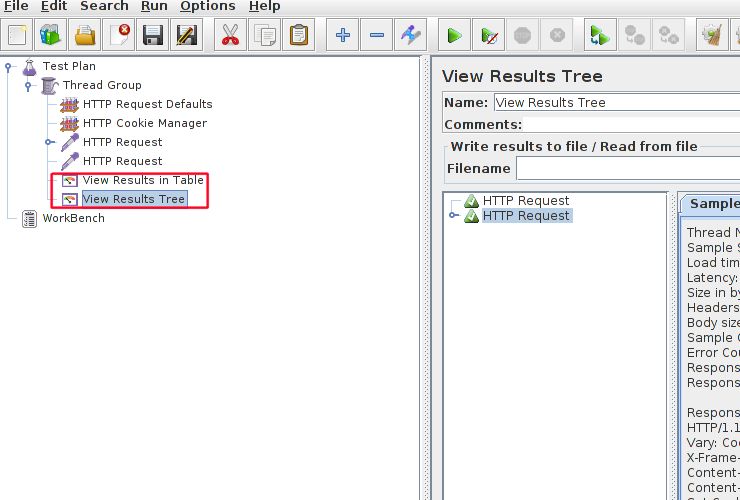
4) When you hit the run button (the green arrow), you can see the test results under View Results in Table and View Results Tree. If there are any errors with the CSRF token, you might need to adjust the regular expression under the first HTTP Request. There might be differences in the output of the {% csrf_token %} template tag depending on the Django version.
That's all there is to it.☺️ Once the test seems to work, you can add more users to the simulation under Test Plan -> Thread Group by changing the Number of Threads parameter.


