I am not a master photographer myself 🙄, but back in the days before I started to study at the University, I was very interested in photography. Enough so to read a great book, 101 Top Digital Photography Tips, about the topic.😊 I really enjoyed the book because it's full of nice tricks for better photography and it's suitable even for those who have no knowledge of photography whatsoever.
Today I am going to share with you what I have learned about using flash and exposure in photography.
Flash 🔦
Turn it off! That's the usual advice given by people who are into photography. It ruins the lighting of the scene and usually it is not nearly enough to even light up your target, especially if you take pictures of landscape. If, however you take portraits of people, using flash will not do them any favor in terms of their looks. Flash is the way to go if you want to give them red eyes and a pale skin color. 😆
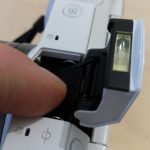
There are still some use cases for flash. It can be used to stop motion of a moving object, it might produce a nice effect for example when it reflects back from raindrops, and in some cameras, you can actually turn the flash towards the ceiling. This is actually good, because then the light will not be reflected directly from your object, but instead indirectly making the lighting look more natural. 🙂
Exposure 
So, how do I make my photos bright if I can't use flash, you might wonder.🤔 Well, there's this nice thing called exposure in every camera's settings. The idea is, that usually, some of the parts in your image end up either being too dark or too light. And the colors in these regions converge towards black or white respectively. The lower the exposure value, the darker the image. The higher, the brighter. Now, let's take a look at these examples (click on the pictures to enlarge them):
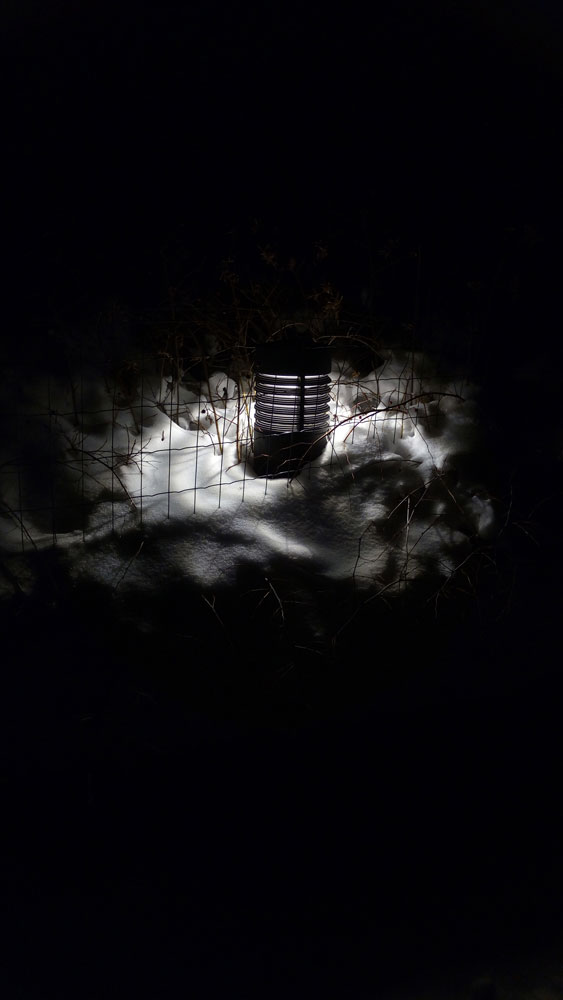
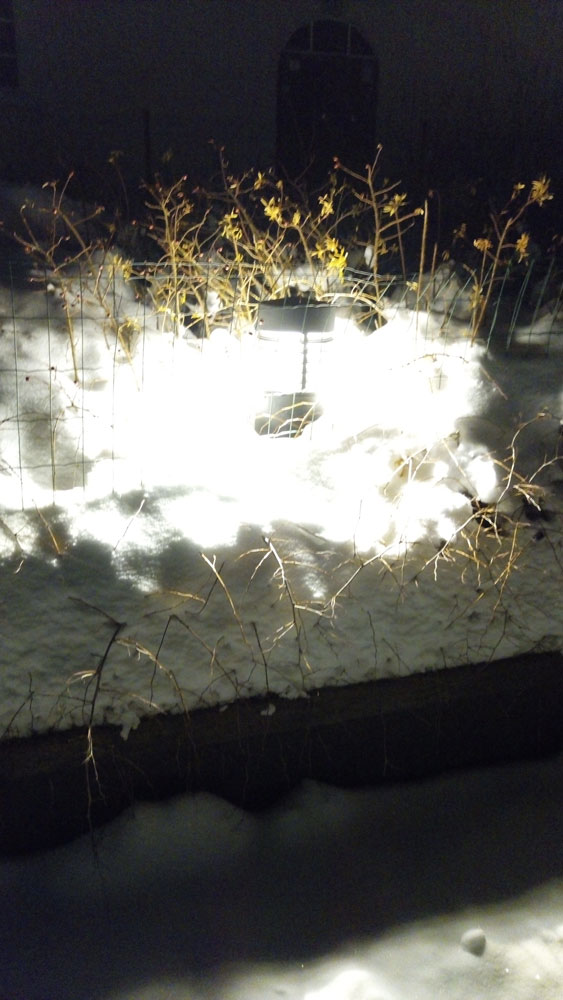
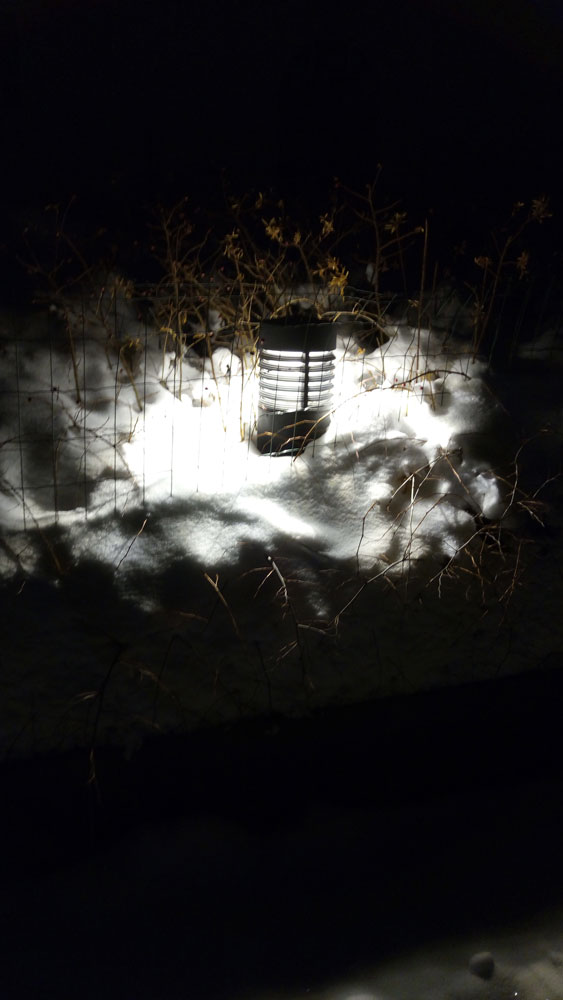
As you can see in the first example with the lowest exposure, you can't see too much of the surroundings, but you get more detail in the brighter regions of image, i.e. the lamp. This is because the light colors don't converge towards the absolute white, but have their distinctive shades. In the second picture, where the exposure is at it's maximum value, you can clearly see more detail in the darker regions of the image. Again, because they won't converge to the absolute black.
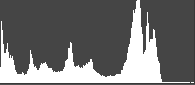
Histogram, is a great tool for getting the exposure right. If the bars are too much on the left, you are on a risk of getting too dark an image, of the bars are on the right, the image will end up too bright.
Some cameras have a feature called HDR (High Dynamic Range), which means that the camera takes multiple photos with different exposures and merges them together producing an image where you have detail in both the light and the dark regions. Isn't that neat or what?😃 If your camera doesn't have this, don't worry, you can still take multiple photos manually and merge them together with Photoshop at home. 🏠
Some cameras can even take RAW images. In that case, you don't have to worry about getting the exposure right when you are taking the picture. Instead, you can just adjust the exposure value later at home. Isn't this cool or what? 😎
I hope this helped you to take better flash free photos. Now you can even take the nice pictures of the sunset 🌅 you have always wanted to take (use low exposure). Thanks for reading! ☺️